Accounts, just like Cost Centers are used in defining segments of your network. An account will mark different segments of your network that are used for the same purpose, or in the same context. An account, therefore, may be associated with more than one Network segment.
See: Network IP Ranges
An account is defined by two properties:
- Account ID
- Account Name
To configure Accounts, you must enter the Accounts Configuration Screen.
In this screen you can:
- Add new accounts
- Search for existing accounts
- Modify existing accounts
- View information about accounts in use
- Generate traffic analysis reports for specific accounts
- Select Configuration > Business Groups > Accounts. The Account Configuration Screen appears in the display section.
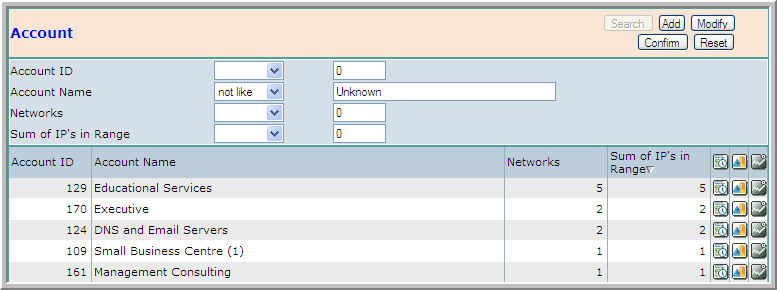
The Account Table
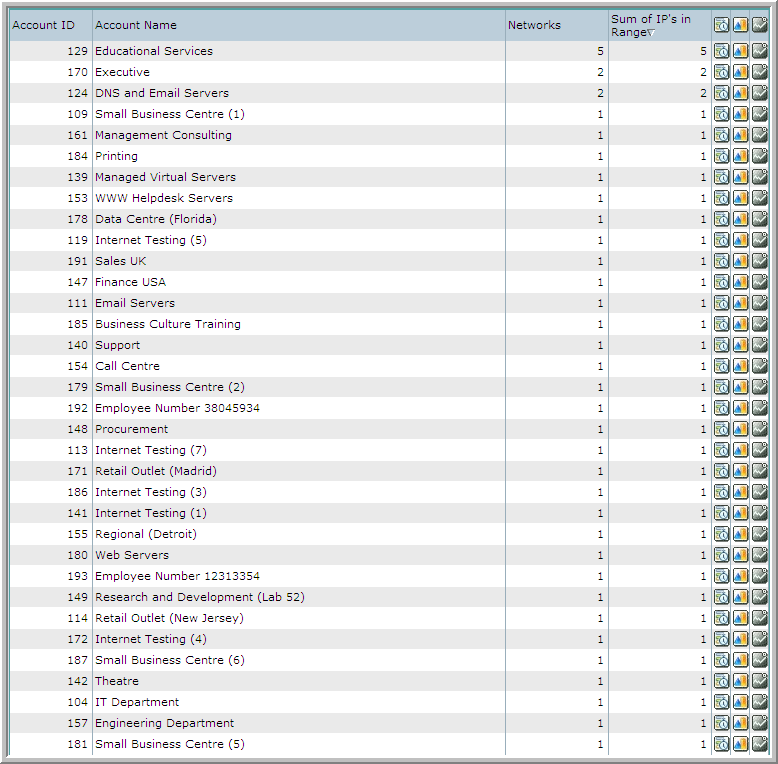
The Account Table displays the following for each account:- Account ID
- Account Name
- Networks – the number of Network IP Ranges associated with this account.
- Sum of IP’s in Range – the number of possible IP’s in these ranges.
- Report Production Buttons
You may add as many accounts as you need to properly segment your network. However, once an account is added, it cannot be removed.
To add a new account:
- After entering Account Configuration, click the Add button.

- Enter an Account Name. The Account ID is automatically entered.
- Click Confirm. The new account is added to the table.
You may change an account’s name but not its ID. This is because the ID, at this stage, might be associated in the database with Network segments.
To modify an account:
- From the Accounts table, select an existing account by highlighting the appropriate row in the table.
- Click Modify. The Account’s details will appear in the edit boxes.

- Modify the Account Name.
- Click Confirm. The account’s details are updated in the table.
You may want the Accounts Table to display only a specified group of accounts according to selected characteristics.
To search for existing accounts:
- Above the Accounts table, click Search. The following is displayed:

- Specify one or more search parameters. Do not forget to assign each search parameter with a logical operator.
- Click Confirm. The table is populated with all the accounts which match the query parameters.
You may want to produce a traffic analysis report for a specific account, or a baseline report for all accounts. To produce a report for a specific account, click one of the Report Production buttons on the right-most column of that account’s row in the table.
Choose one of the following:
-
 produce a report baselining the last week of traffic usage from this Account (Source by Weekday).
 -
 produce a report showing the last month of traffic usage from this Account (Source by Dest. IP).
 -
 produce a report showing the last hour of traffic usage from this Account (Source by Server Port).